Showing posts with label Blogger Tips. Show all posts

Copy All Your Blogger Posts to anther Blog |SIMPLE|

Hey,How you doing Guys Mrad4Tech is here again with a new post.This Post is for those who want to create more than blogger with the same content or for those who want to transfer their blogger site to another G account,by this you will transfer all your posts,So lets start with the steps

First Step  ; Go to blogger where you want to copy from,Go to settings>>Others>>Export Blog>>Download
Second Step : Go to blogger you want to copy posts to and go to settings>>Others>>Import Blog>>and choose the file you download in the first  step

Complete the security things and then ur done,wish this helped if not please comment your issue and ill help you :)

[2015] Activate Microsoft Office 2013 Easily No Surveys


Introduction

Microsoft Office 2013 is one of the most elegant Office system ever made by Microsoft.

Why Microsoft Office 2013 special ?

it is special because of its advanced user interface , the newfeatures are itself a great for Office.s.Microsoft Office 2013  Is a evolution of all versions of office by Microsoft.


Need Of Activation?

To Unlock full version of Microsoft Office 2013 you have to buy its serial keys or product keys from market because it is  premium by Microsoft. So to enjoy full features of Microsoft Office 2013 you need a product key to unlock its premium features.
But the problem is that its serial keys that are free are not working well.So today I am showing you how to premium features and activate Microsoft Office 2013 with all its version for free


Requirments

Microsoft Office 2013  activator from the Downloads Tab below
Microsoft Office 2013

Step By Step

First download the activator from the link below
Second,run the setup 
Third Restart your PC


Downloads


How to Download 


Add Smart Floating Social Share Bar To Blogger And WordPress


via 
I have already post regarding floating social share buttons in my previous post  How to Add Floating Social Share Button To Blogger / WordPress. In the previous post I show you how to add simple social share bar buttons. In the previous post, I have also shown it in differed ways.

But smart floating social share buttons gives an extraordinary look of your blog as well as it locates extremely left side of your blog. But in this post, I teach you how to add Smart Floating Social Bar buttons extremely left side of your blog.

Social share buttons help bloggers or website owners to share their online contents on social networking sites like Facebook, Twitter, Google+, LinkedIn, Pinterest etc. You can add floating social share buttons either left side or right side to your blog. But the best position is left side. You can add social share buttons just after end of the each blog post also.

There are many ways to add social share button to your blog / websites. No matter where your blog is hosted. You can easily add this widget to your blog.

I have seen smart floating social share bar in many blogs or websites. But by default all have only five buttons to share your blogs. But I have customize the code for ten social share buttons. You can see my blog and other blogs. You will see the difference.

This trick is very simple. No programming knowledge is required. This process works on both blogger and wordpress blog. Like my previous tricks you can also customize this gadget for a certain limit.

You can add this gadget to your blogger / wordpress blog in two ways. Here I will show you both process.
Process 1.

This is the copy and paste process. There are some codes below which are taken from AddThis. In this process you just need to copy the below codes first.

<!-- AddThis Smart Layers BEGIN -->
<!-- Go to http://www.addthis.com/ to customize -->
<script type="text/javascript" src="//s7.addthis.com/js/300/addthis_widget.js#pubid=xa-532001536456a2bc"></script>
<script type="text/javascript">
  var addthis_product = 'blg-1.0';
  addthis.layers({
    'theme' : 'transparent',
    'share' : {
      'position' : 'left',
      'numPreferredServices' : 10
    },
    'follow' : {
      'services' : [
        {'service': 'facebook', 'id': 'maniruddinmansuri'},
        {'service': 'twitter', 'id': 'maniruddi'},
        {'service': 'linkedin', 'id': 'ManiruddinMansuri'},
        {'service': 'google_follow', 'id': '+ManiruddinMansuri1'},
{'service': 'pinterest', 'id': 'maniruddin'},
{'service': 'tumblr', 'id': 'maniruddin'},
        {'service': 'youtube', 'id': 'mcomindia'}
      ]
    },
    'whatsnext' : {},
    'recommended' : {}
  });
</script>
<!-- AddThis Smart Layers END -->
<div style="clear: both;font-size: 9px;text-align:center;"><a style="color: #3399BB;" href="http://www.manidin.com">Get This Widget</a>
</div>
After copying the above codes you need to do the following steps for blogger and wordpress.

How to add to blogger

Step 1. Login to your blogger account
Step 2. Click Layout which is located left side
Step 3. Click Add a Gadget

Step 4. Scroll down and select HTML/JavaScript from Popup Window


Step 5. After that paste the above copied code inside the Content box. see the below image.


Step 6. After pasting the code click Save 

Step 7. Click Save arrangement

You have done for blogger. Click View blog. Now you will  able to see the smart floating social share bar extremely left side of your blog.
Watch this video


How to add to WordPress

Step 1. First Login to your wordpress account
Step 2. Go to Widgets
Step 3. Select a Text widget
Step 4. And now paste the above code to the text widget.
Step 5. Click Save to save the widget.

Process 2

In the second process you need to go to http://www.addthis.com/ and after providing your facebook, twitter, google+, linkedin profile address click Install Blogger Widget. If you select platform WordPress then you see Install WordPress PluginOnce you click Install Blogger Widget add page element window opens.  


On the add page element window you need to click Add Widget. If you are not login to your blogger or wordpress account before doing this process, it asks for login. Once you login to your account the gadget will be installed.


Add Code Box Area In Blogger Posts | Mrad4Tech


It is good to have a code box area in your blogger posts if your blog is about blogger tutorials, blogger widgets, blogger templates or it deals with any kind of blog customization. It will become easy for anybody to locate the html code and easily copy and paste the code for using it. It will also give a well organised look to your blog posts. Just read and follow all the steps given below to get this function in your blogger blog for each post.

Step1: Log in to your blogger account Go to Dashboard >>template

Step2: Click on the Customize.

Step3: GO to Advanced >> Add CSS.

Step4: Copy and Paste the following code in the Add CSS section.

[Code Box just as this]
.code { background:#f5f8fa; background-repeat:no-repeat; border: solid #5C7B90; border-width: 1px 1px 1px 20px; color: #000000; font: 13px 'Courier New', Courier, monospace; line-height: 16px; margin: 10px 0 10px 10px; max-height: 200px; min-height: 16px; overflow: auto; padding: 28px 10px 10px; width: 90%; } .code:hover { background-repeat:no-repeat; }


Step5: Now whenever you are composing new post , just select HTML section and paste the following code.

<div class="code">Paste your code</div> 


<div class="code">Paste your code</div> 
Step6:  Go to Compose mode.  Replace Paste your code with your code. Complete your post and publish it.

How to change Your Post Title and Date postion


1. Go to your Template Designer.
2. Go to “Advanced”, then click on “Add CSS”.
3. Copy and paste this code into the “Add CSS” window.
.post-title {
text-align: postion;
}
.date-header {
text-align: postion;
}

4. change  with left ,  center  , right   according to what you need
5-Thank you and enjoy 
NOTE:- If you like this Post Please Give Comments For Your Feedback Suggestion Or Help Thanks..! 

Add Facebook Like Box Pop-Up to your Blogger 2015


Facebook is one of the best ways to get traffic to your website or blog.
So In this tutorial i will show you how to add a cool floating Facebook like widget for Blogger that slides to the left on mouseover.


  • Go To Blogger >> Layout >> Add a Gadget
  • Choose HTML/JavaScript
  • Paste The Following Code in Content Box


<!-- Facebook Popup Widget START --><!-- Brought to you by www.mrad4tech.tk  -->
<script src='http://ajax.googleapis.com/ajax/libs/jquery/1.7.2/jquery.min.js' type='text/javascript'></script>
<style>
#fanback {
display:none;
background:rgba(0,0,0,0.8);
width:100%;
height:100%;
position:fixed;
top:0;
left:0;
z-index:99999;
}
#fan-exit {
width:100%;
height:100%;
}
#Burptech {
background:white;
width:420px;
height:270px;
position:absolute;
top:58%;
left:63%;
margin:-220px 0 0 -375px;
-webkit-box-shadow: inset 0 0 50px 0 #939393;
-moz-box-shadow: inset 0 0 50px 0 #939393;
box-shadow: inset 0 0 50px 0 #939393;
-webkit-border-radius: 5px;
-moz-border-radius: 5px;
border-radius: 5px;
margin: -220px 0 0 -375px;
}
#Burp {
float:right;
cursor:pointer;
background:url(https://blogger.googleusercontent.com/img/b/R29vZ2xl/AVvXsEit7YaHHu069BjWEzIJUL7riZxKy_CkXRcUeBr58rcz7d3eft3mGnKxQn5zdRuyL1u7NlFAQuSdKNTU0AYQKsQiWFgJnQZSskt9ukUCgLQ5t6RhiVmdWHVku0kTULJZOOUPmmnF70MXcFm6/s1600/Burp.png) repeat;
height:15px;
padding:20px;
position:relative;
padding-right:40px;
margin-top:-20px;
margin-right:-22px;
}
.remove-borda {
height:1px;
width:366px;
margin:0 auto;
background:#F3F3F3;
margin-top:16px;
position:relative;
margin-left:20px;
}
#linkit,#linkit a.visited,#linkit a,#linkit a:hover {
color:#80808B;
font-size:10px;
margin: 0 auto 5px auto;
float:center;
}
</style>
<script type='text/javascript'>
//<![CDATA[
jQuery.cookie = function (key, value, options) {
// key and at least value given, set cookie...
if (arguments.length > 1 && String(value) !== "[object Object]") {
options = jQuery.extend({}, options);
if (value === null || value === undefined) {
options.expires = -1;
}
if (typeof options.expires === 'number') {
var days = options.expires, t = options.expires = new Date();
t.setDate(t.getDate() + days);
}
value = String(value);
return (document.cookie = [
encodeURIComponent(key), '=',
options.raw ? value : encodeURIComponent(value),
options.expires ? '; expires=' + options.expires.toUTCString() : '', // use expires attribute, max-age is not supported by IE
options.path ? '; path=' + options.path : '',
options.domain ? '; domain=' + options.domain : '',
options.secure ? '; secure' : ''
].join(''));
}
// key and possibly options given, get cookie...
options = value || {};
var result, decode = options.raw ? function (s) { return s; } : decodeURIComponent;
return (result = new RegExp('(?:^|; )' + encodeURIComponent(key) + '=([^;]*)').exec(document.cookie)) ? decode(result[1]) : null;
};
//]]>
</script>
<script type='text/javascript'>
jQuery(document).ready(function($){
if($.cookie('popup_user_login') != 'yes'){
$('#fanback').delay(1000).fadeIn('medium');
$('#Burp, #fan-exit').click(function(){
$('#fanback').stop().fadeOut('medium');
});
}
$.cookie('popup_user_login', 'yes', { path: '/', expires: 7 });
});
</script>
<div id='fanback'>
<div id='fan-exit'>
</div>
<div id='Burptech'>
<div id='Burp'>
</div>
<div class='remove-borda'>
</div>
<iframe allowtransparency='true' frameborder='0' scrolling='no' src='//www.facebook.com/plugins/likebox.php?
href=https://www.facebook.com/Mrad4Tech&width=402&height=255&colorscheme=light&show_faces=true&show_border=false&stream=false&header=false'
style='border: none; overflow: hidden; margin-top: -19px; width: 402px; height: 230px;'></iframe><center>
<span id="linkit">Powered by <a href="http://www.Mrad4Tech.tk">Mrad4Tech.tk</a> - <a href="http:/www.Mrad4Tech.tk">Facebook Like Box</a></span></center>
</div>
</div>


Enter your Facebook Page Name

replace Mrad4Tech  with your site’s facebook page URL or id


Popup every time the page loads 
By default, the like box widget only shows up the first time the user visits your page. If you would like the facebook box to popup every time the page loads, then remove this line of code:


$.cookie('popup_user_login', 'yes', { path: '/', expires: 7 }); 

Add Material Design Floating "Back to Top" Button | Blogger


Back to Top button or link is a link that sends your viewer to the top of page once clicked. This will help your readers navigate better, especially so if you have long pages. This link is usually located at the bottom of page or in the footer area.

What I am going explain in this article is slightly different. The function is the same yet the location of the link/button is different. As the name suggests, we are making a floating (or is it static) button. The button will float at the bottom of your screen. It will stay there even if you scroll the page, and can be seen at all times. We will do this using only a short HTML code, with a little inline styling.
Note: This trick will not work in older versions of Internet Explorer. The button will appear nonetheless, but at the center bottom of your page, and it doesn’t float.
Here are the steps:

  1. Login to your Blogger account.
  2. Go to Dashboard > Design > Edit HTML.
  3. Back up your template.
  4. Insert the following code immediately before the </body> tag in your HTML
<a style="position: fixed; bottom:5px;right:5px;" href="#" title="Back to Top"><img style="border: none;" src="https://blogger.googleusercontent.com/img/b/R29vZ2xl/AVvXsEjnV7PC9A3VyDkHLEw-s27kkzUpbj9z3_Fh02IUGhH-gwb9eTpuBEoc_OIXF4Ucp0K7c-PkwUgPSm-g1zImnfKhWG1nGRAdCxrJVstIknO_Vuz9mA_pGOqoB5D77UMC8HN0Bwd8gBYuLo3U/s1600/Untitled-1.png"/></a>


5. You can change the location of the button / link by changing the values of this code:
bottom:5px; left:5px;

Note:

-The Material Desgin Up Arrow is made by me :)
- If u like this post please give me your comments for your feedback suggestion or help.Thanks..! -
Enjoy!


How to add Dotted Separator between Blogger Posts [like the one i am using now ]


To add separation lines go to your Blog's Dashboard --> Template --> Customize --> Advanced --> Add CSS... Now paste the following code in the box that says Add Custom CSS:

For Solid Line


.post { border-bottom: 3px solid Gray !important; }


For Dotted Line


.post { border-bottom: 3px dotted Gray !important; } 


For 2 parralel lines


.post { border-bottom: 3px double Gray !important; } 


This code will add a Line below every Gadget on your Sidebars. You can now adjust it to make it the way you want.

A) Where it says "1px", change the number until you reach the size you want for your separation line.
B) Where it says "solid", replace it with dotted, or solid, or double, - to chage the style of the line - and see which one you like best.
C) Where it says "Gray",replace it with the name of the color you want 
NOTE:- If you like this Post Please Give Comments For Your Feedback Suggestion Or Help Thanks..!
That's it, done!

Top 9 List View Blogger Templates

Hey Guys in this post i am showing you the 10 best List View Blogger templates accodring to my own experirence. I have bought alot of templates and tried them all.These templates are usally used for Android Blogs and news Blogs also,but i used them for Android purpose so the blogger template views all my posts in a list view so that the visitor can see many posts without he need to scroll down an up...So lets start

These are the Best 10 List View Blogger Templates From Mrad4Tech

1-Headlines


Headlines Blogger Template


2-Maggner


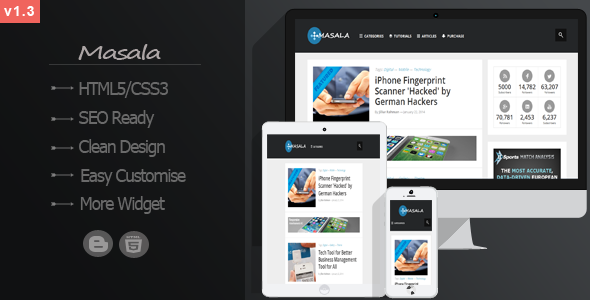
3-Masala


Masala - Responsive Multipurpose Blogger Template


4-MetroManalist


live demo


5-Minima  Responsive


Minima Responsive Blogger Template


6-Hybrid News


live demo


7-G Vusion


8-A Fusion


A Fusion Responsive Blogger Template. Free Blogger templates. Blog templates. Template blogger, professional blogger templates free. blogspot themes, blog templates. Template blogger. blogspot templates 2013. template blogger 2013, templates para blogger, soccer blogger, blog templates blogger, blogger news templates. templates para blogspot. Templates free blogger blog templates. Download 1 column, 2 column. 2 columns, 3 column, 3 columns blog templates. Free Blogger templates, template blogger. 4 column templates Blog templates. Free Blogger templates free. Template blogger, blog templates. Download Ads ready, adapted from wordpress template blogger. blog templates Abstract, dark colors. Blog templates magazine, Elegant, grunge, fresh, web2.0 template blogger. Minimalist, rounded corners blog templates. Download templates Gallery, vintage, textured, vector,  Simple floral.  Free premium, clean, 3d templates.  Anime, animals download. Free Art book, cars, cartoons, city, computers. Free Download Culture desktop family fantasy fashion templates download blog templates. Food and drink, games, gadgets, geometric blog templates. Girls, home internet health love music movies kids blog templates. Blogger download blog templates Interior, nature, neutral. Free News online store online shopping online shopping store. Free Blogger templates free template blogger, blog templates. Free download People personal, personal pages template blogger. Software space science video unique business templates download template blogger. Education entertainment photography sport travel cars and motorsports. St valentine Christmas Halloween template blogger. Download Slideshow slider, tabs tapped widget ready template blogger. Email subscription widget ready social bookmark ready post thumbnails under construction custom navbar template blogger. Free download Seo ready. Free download Footer columns, 3 columns footer, 4columns footer. Download Login ready, login support template blogger. Drop down menu vertical drop down menu page navigation menu breadcrumb navigation menu. Free download Fixed width fluid width responsive html5 template blogger. Free download Blogger Black blue brown green gray, Orange pink red violet white yellow silver. Sidebar one sidebar 1 sidebar  2 sidebar 3 sidebar 1 right sidebar 1 left sidebar. Left sidebar, left and right sidebar no sidebar template blogger. Blogger seo Tips and Trick. Blogger Guide. Blogging tips and Tricks for bloggers. Seo for Blogger. Google blogger. Blog, blogspot. Google blogger. Blogspot trick and tips for blogger. Design blogger blogspot blog. responsive blogger templates free. free blogger templates. Blog templates. A Fusion Responsive Blogger Template. A Fusion Responsive Blogger Template. A Fusion Responsive Blogger Template.


9-Blacklight


BlackLight Blogger Template


NOTE:- If you like this Post Please Give Comments For Your Feedback Suggestion Or Help Thanks..!

Fix Images Thumbnails not showing in Blogger


Hello bloggers from this post i will teach you how can you easily fix image thumbnail not appearing problem in your blog.some time you might have noticed your entire image thumbnails suddenly got disappeared from the homepage of your blog.then you thinking that you may have done some unnecessary editing to your blogger template, which might be the reason image thumbnails are not appearing on the homepage or archive pages.but don't worry it's not your fault, this is the new bug that recently blogger users are facing.if you are facing this problem then let start and fix this problem Follow below steps...


Step:- 1 Go to your blogger >>>>dashboard and then go to >>>>posts.. (Watch below image)


Step:- 2 Now select your post (image thumbnail not showing problem post)

Step:- 3 Now click on edit button (Watch below image)


Step:- 4 Now click  on HTML tab (Watch below image


Step:- 5 Now click ctrl + f  key from your keyboard

Step:- 6 Now find for the following code https://

Step:- 7 Now replace all the URLs that are starting with https:// to http://(Watch below image


Step:- 8 Now hit on update post button and publish your post 

Step :- 9 Go back and reload your home page, now your image thumbnails will start appearing again on your homepage ...


Note:- If u like this post please give me your comments for your feedback suggestion or help.Thanks..!